Why this matters
Central Florida gets storms that produce straight-line wind, hail, and wind-driven rain several times a year, and most roof damage from those events isn't obvious from the driveway. A few missing shingles are easy to spot. Bruised granules, lifted tabs, and a soffit vent that's been pulling loose are not. The gap between "the roof looks fine" and "the roof is fine" is where slow leaks and denied insurance claims both come from — so the goal here is to get you looking in the right places, in the right order, without getting on a ladder or a wet roof yourself.
This is a homeowner-level checklist, not a substitute for a professional inspection. If anything below turns up damage, or if you're not sure, that's the point where you call it in rather than guess.
Ground-level exterior checklist
Do this walk the same day if it's safe — daylight, no standing water, no downed lines nearby.
- Walk the full perimeter and look up at roof planes from a distance — binoculars help. Look for missing, torn, or visibly lifted shingles or tiles.
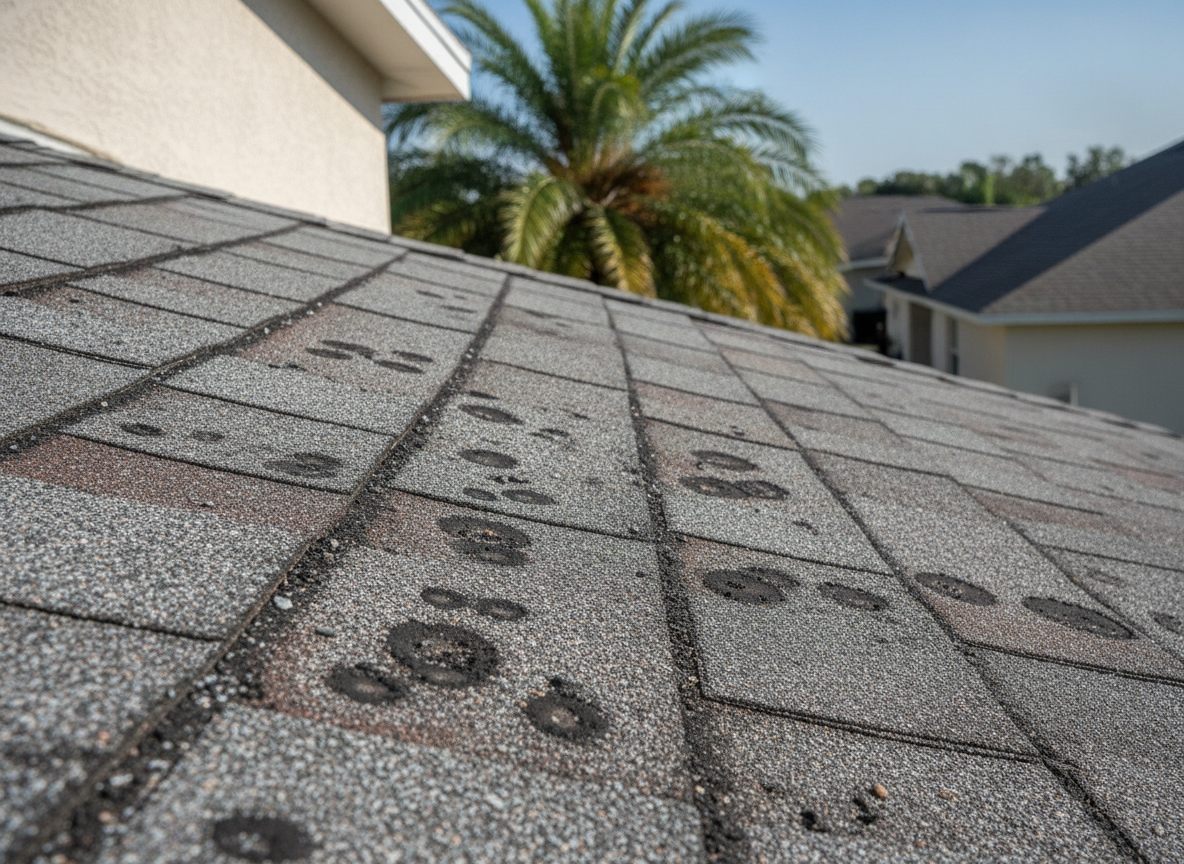
- Check the ground and gutters for granules (shingle roofs shed a gritty sand-like layer when hail or impact damages them), broken tile pieces, or metal panel fragments.
- Look at gutters and downspouts for dents — hail that's big enough to dent aluminum gutters is usually big enough to damage a roof surface too.
- Check flashing around chimneys, skylights, and roof-to-wall junctions for anything visibly bent, lifted, or separated.
- Look at soffits and fascia boards for cracks, sagging, or panels that have pulled loose from wind uplift.
- Check for fallen branches or debris still resting on the roof — don't try to remove anything heavy yourself; note it and leave it for the crew.
- Check any detached structures too — sheds, lanai/pool cage screens, and carports take wind damage that homeowners often miss while focused on the main roof.
Interior checklist
Roof damage often shows up inside before it's visible outside, so check these the same day and again over the following week.
- Check ceilings in every room, including closets, for new discoloration, staining, or a soft/spongy feel.
- Check the attic with a flashlight for daylight coming through the roof deck, wet insulation, or active drips — this is often the earliest and clearest sign of a breach.
- Check around interior light fixtures, vents, and skylight frames for staining rings.
- Listen and check for a musty smell in upstairs rooms or closets over the following days — a slow leak often announces itself with odor before a visible stain.
Documenting damage for an insurance claim
If you find anything on the lists above, how you document it in the first 24-48 hours matters for the claim that follows.
- Photograph and video everything before you touch or clean up anything — wide shots showing context (which roof plane, which side of the house) plus close-ups of the damage itself.
- Note the date and, if you know it, the storm event that caused it — insurers ask which specific weather event produced the damage.
- Do any temporary protection needed to prevent further interior damage (a tarp over an active leak, for example) and keep receipts — reasonable emergency mitigation is typically reimbursable, but keep records.
- Don't sign anything with a contractor who shows up unannounced offering to "handle the whole claim" before you've had your own roofer document the damage.
- Get a written, itemized inspection report from a roofing contractor before you file, or immediately after — an adjuster's assessment goes smoother when there's an independent scope already on paper.
For the full walkthrough of what happens after you file — adjuster meetings, supplements, and what Crownline does and doesn't do in that process — see our insurance claims page.
Recommended next step
If any item on this checklist raised a question mark, don't wait for a leak to confirm it. A professional inspection catches the damage that's invisible from the ground — displaced underlayment, cracked tiles that haven't slipped yet, fastener back-out — before it becomes a bigger repair or a harder claim to support.
Request a Free Inspection